How to Make a Crystal Suncatcher: DIY Step by Step Guide
I still remember the first crystal suncatcher I ever made—a simple creation with fishing line and a small quartz point.
Though basic, the joy of seeing those first rainbow prisms dance across my walls was magical. Creating your own suncatcher connects you deeply to its energy while allowing for personal customization.
This guide will walk you through creating a beautiful crystal suncatcher with easy-to-find materials. (Note - at Coppermoon we also make the most beautiful wooden suncatchers on the market, and I'll show some sample designs you can try.)
Materials You'll Need
The quality of your materials directly impacts both the visual appeal and energetic properties of your finished suncatcher.
Basic supplies:
- Clear fishing line or jewelry wire (0.3-0.5mm thickness)
- 1-3 crystal points or tumbled stones (quartz works excellently)
- Small crystals or glass beads (4-6mm) for accent
- Wire cutters and needle-nose pliers
- Small metal hoop or driftwood piece (for hanging base)
- Optional: copper wire for wrapping crystals
For quality crystals specifically selected for light refraction, start with clear quartz, amethyst, or citrine.
Step 1: Design Your Suncatcher
Before gathering materials, envision the energy and pattern you want your suncatcher to embody.
Simple designs for beginners:
- Single crystal drop with small accent beads
- Three crystals hanging at different lengths
- Circular arrangement with crystals pointing outward
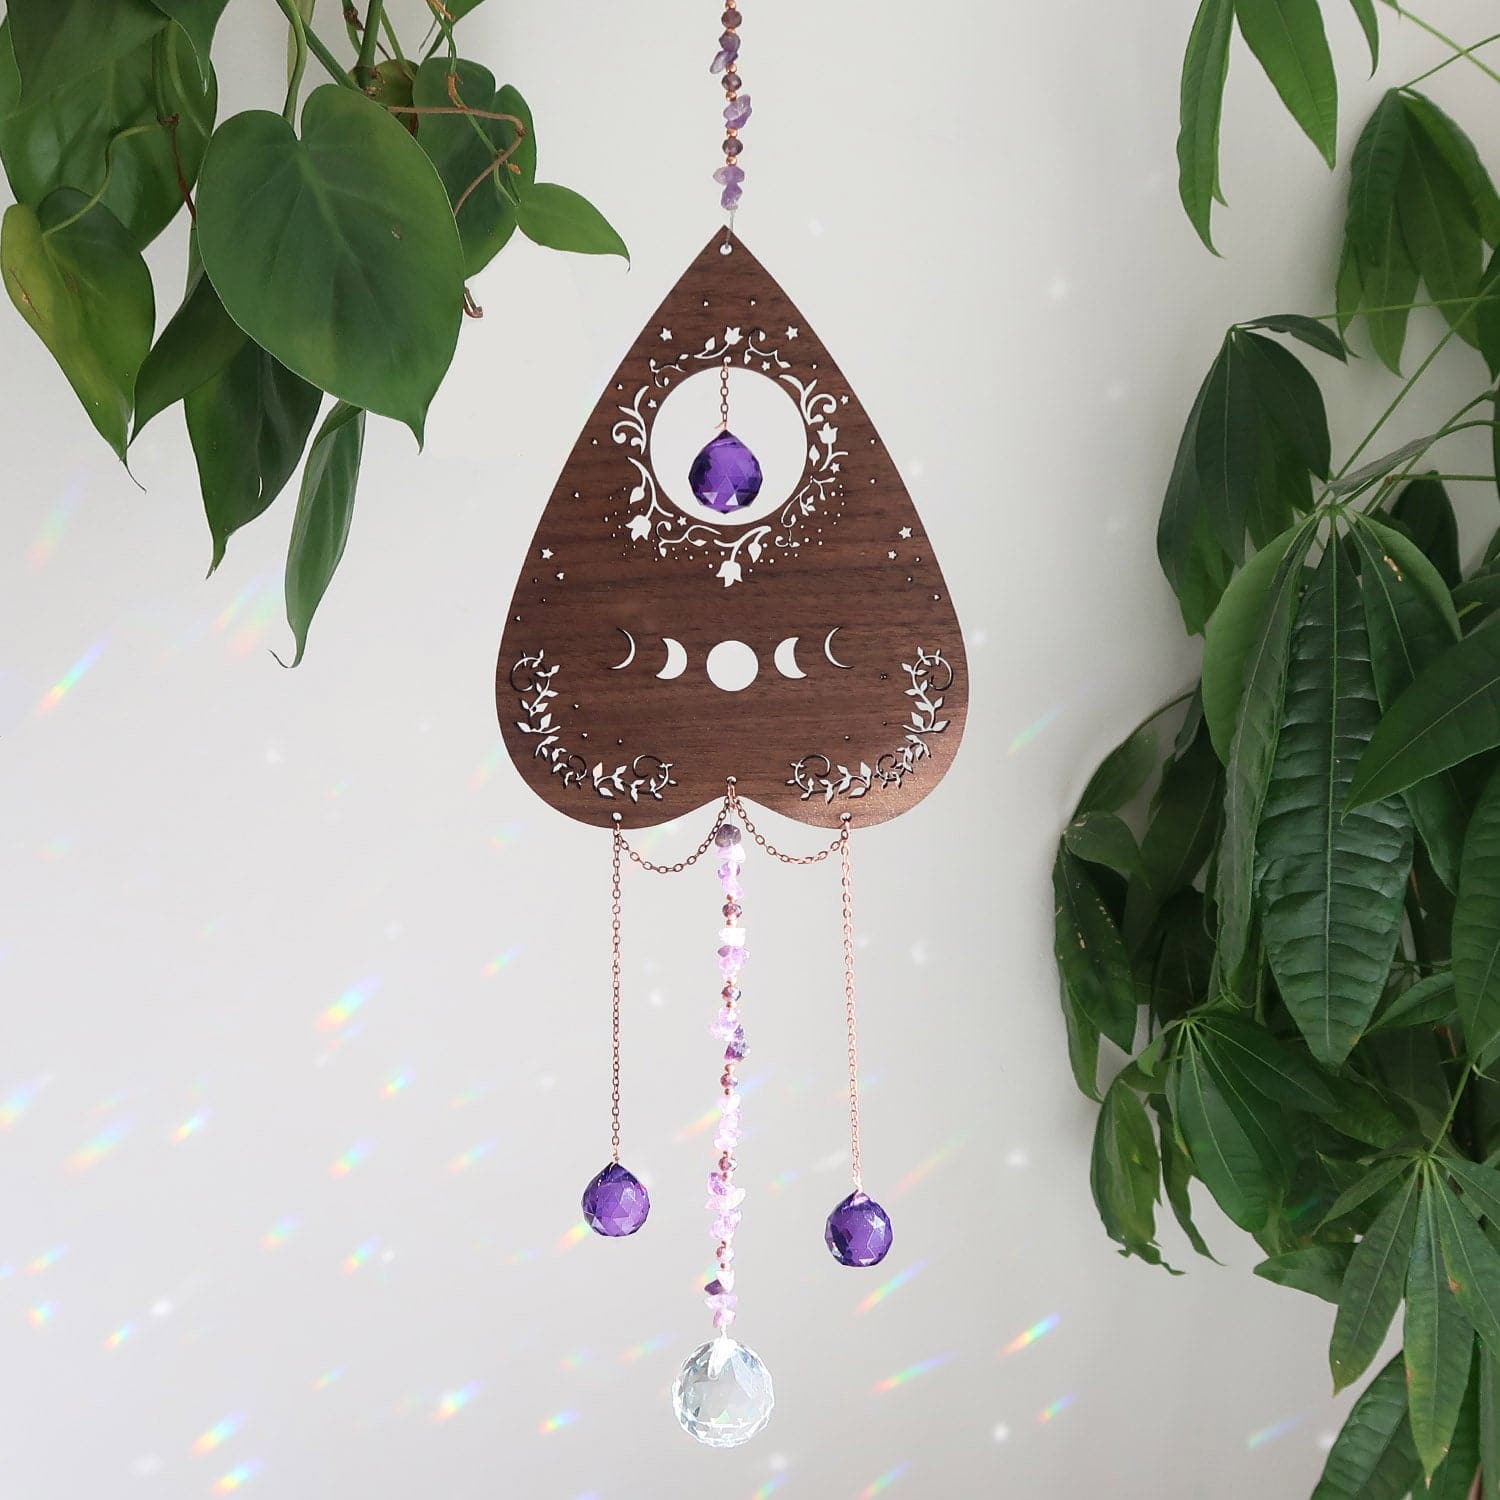
For inspiration, our Moon Phase Crystal Suncatcher demonstrates how multiple hanging elements create complex rainbow patterns.
While your DIY version will be simpler, notice how varying lengths creates more dynamic light effects.
Sketch your design on paper first, noting crystal placement and hanging lengths.
Step 2: Prepare Your Crystals
Properly cleansed crystals ensure your suncatcher brings only positive energy into your space.
To prepare your crystals:
- Rinse under running water (avoid with water-sensitive stones)
- Place in moonlight overnight
- Pass through sage smoke or incense
- Hold each crystal and set your intention
For crystals with natural termination points, positioning these downward creates the most pronounced rainbow effects.
Step 3: Create Your Base Structure
The hanging base determines both the stability and visual harmony of your finished suncatcher.
For a simple hoop base:
- Choose a small metal ring, embroidery hoop, or wrapped driftwood piece
- Mark evenly spaced points where crystals will hang
- For wooden bases, add small eye hooks at marked points
- For metal hoops, tie fishing line directly to the hoop
If you prefer a more elaborate base, our Large Lotus Flower Suncatcher Sphere Holder showcases how carved wooden designs add symbolic meaning.
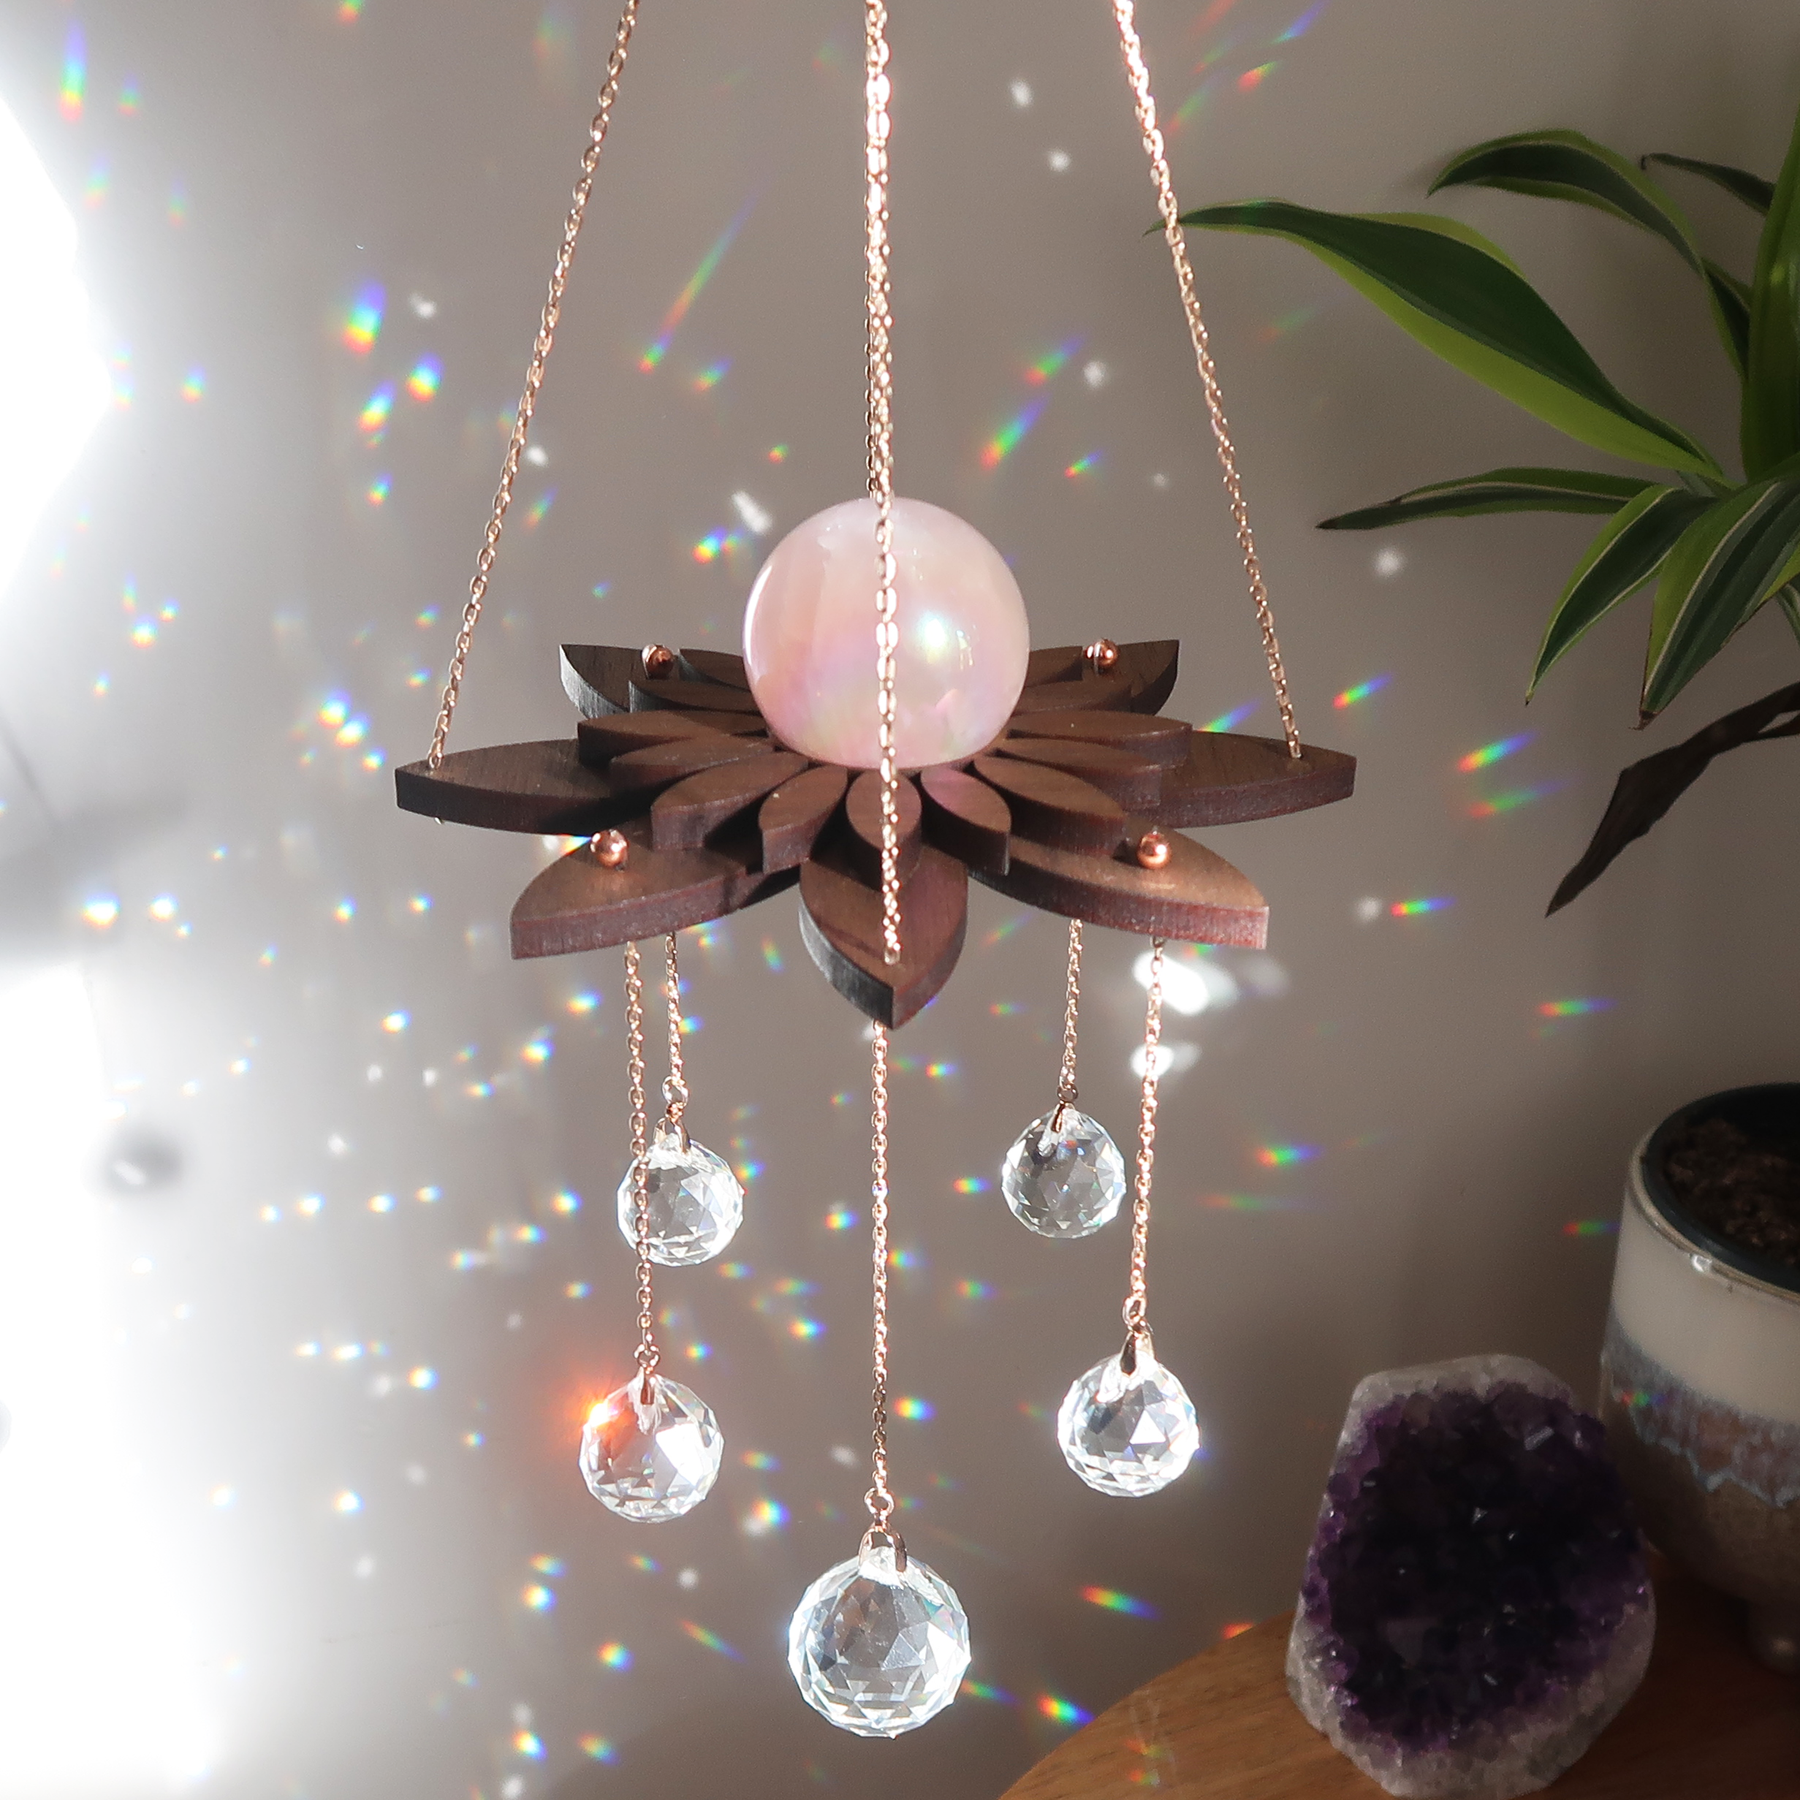 While your DIY version might use simpler materials, consider incorporating meaningful shapes into your design.
Step 4: Attach Your Main Crystals
Secure attachments ensure your suncatcher will last while allowing crystals to move freely in the breeze.
For wire-wrapped crystals:
- Cut 8-10 inches of wire or fishing line
- Create a small loop at one end
- Wrap the crystal firmly but not too tightly
- Leave enough wire at the top to attach to your base
If wire-wrapping feels challenging, our Wooden Crystal Woodland Suncatcher demonstrates how crystals can be secured with decorative beading techniques instead.
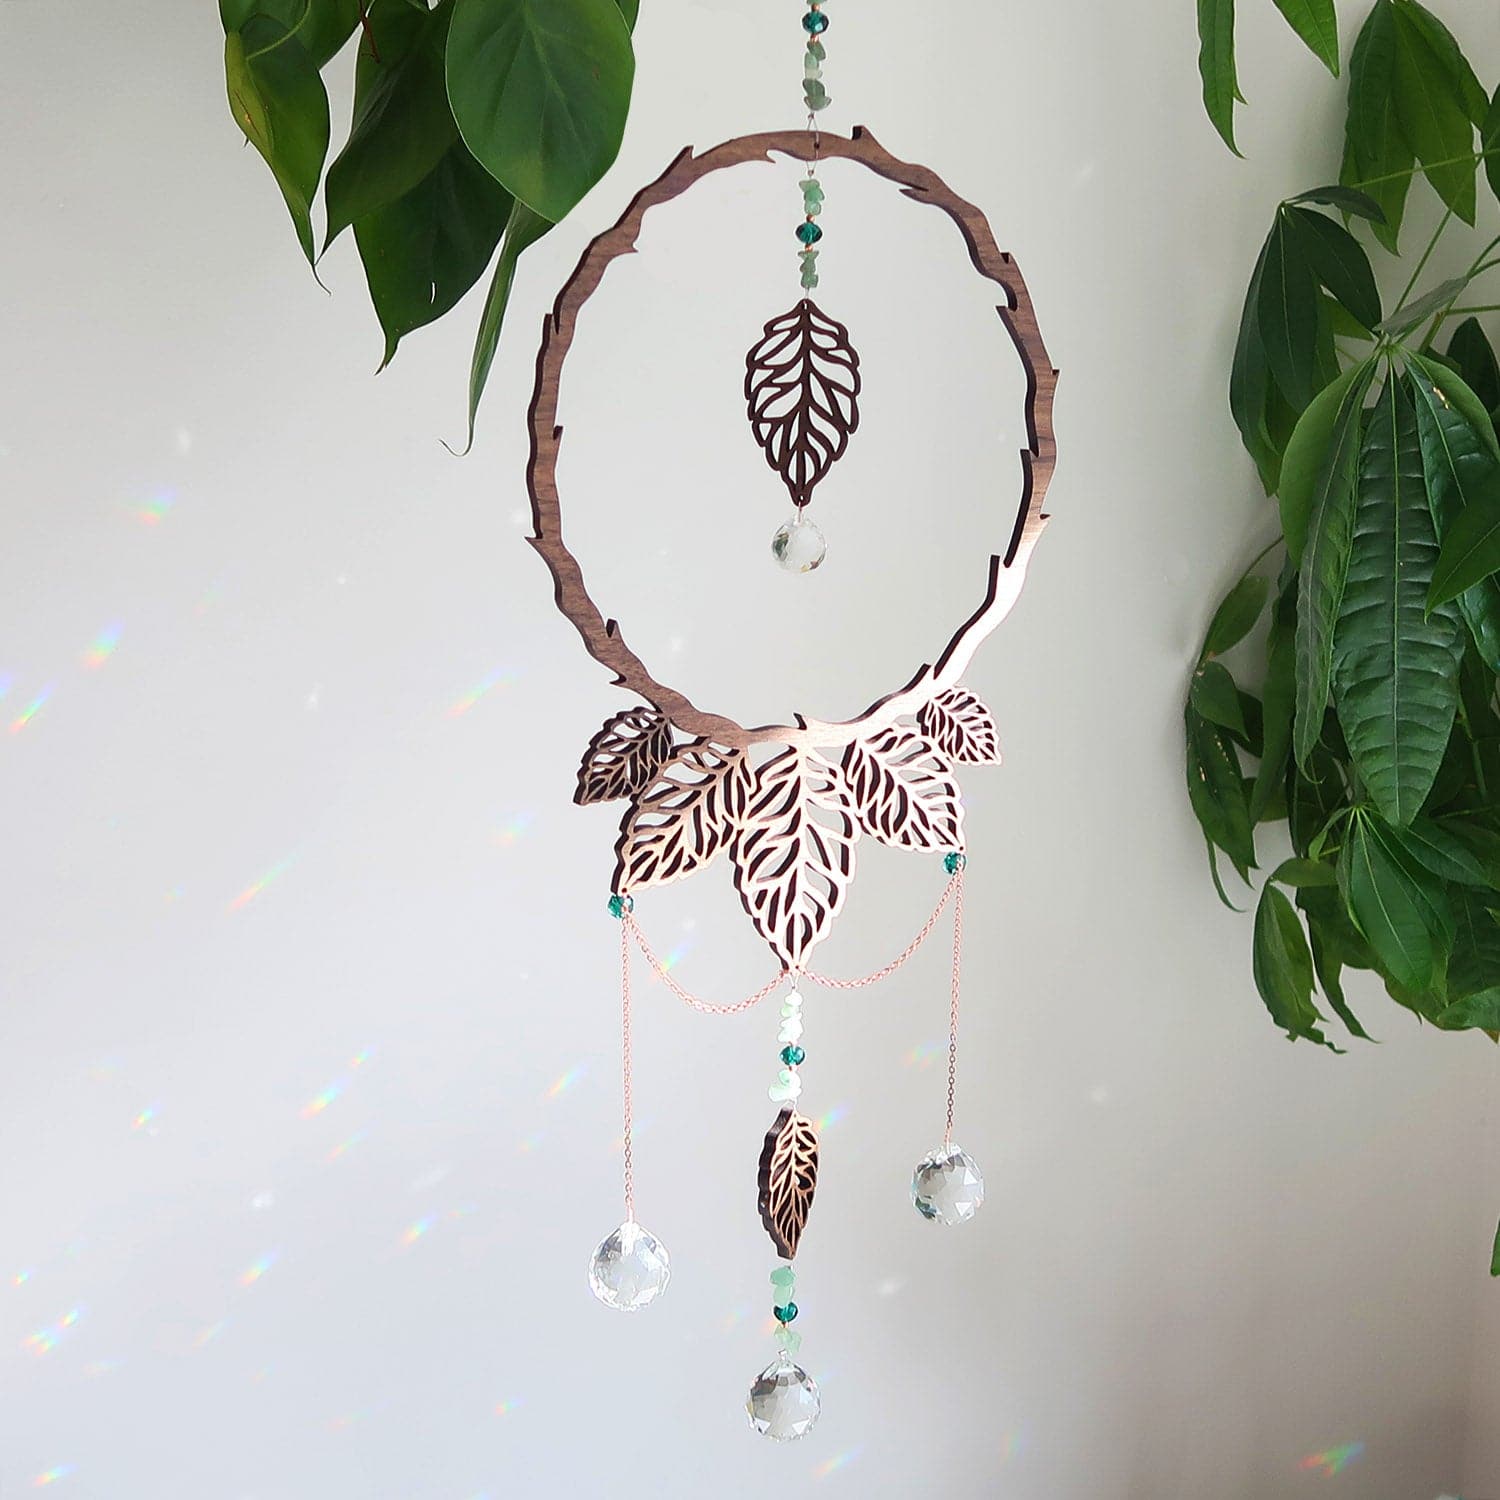 Notice how copper beads both secure and complement the aventurine crystals.
Step 5: Add Accent Elements
Small accent beads or crystals enhance the overall energy while creating more complex light patterns.
To add accents:
- String small beads onto your hanging lines
- Place clear quartz or glass beads at strategic points
- Consider adding copper beads to conduct crystal energy
- Space elements to allow free movement
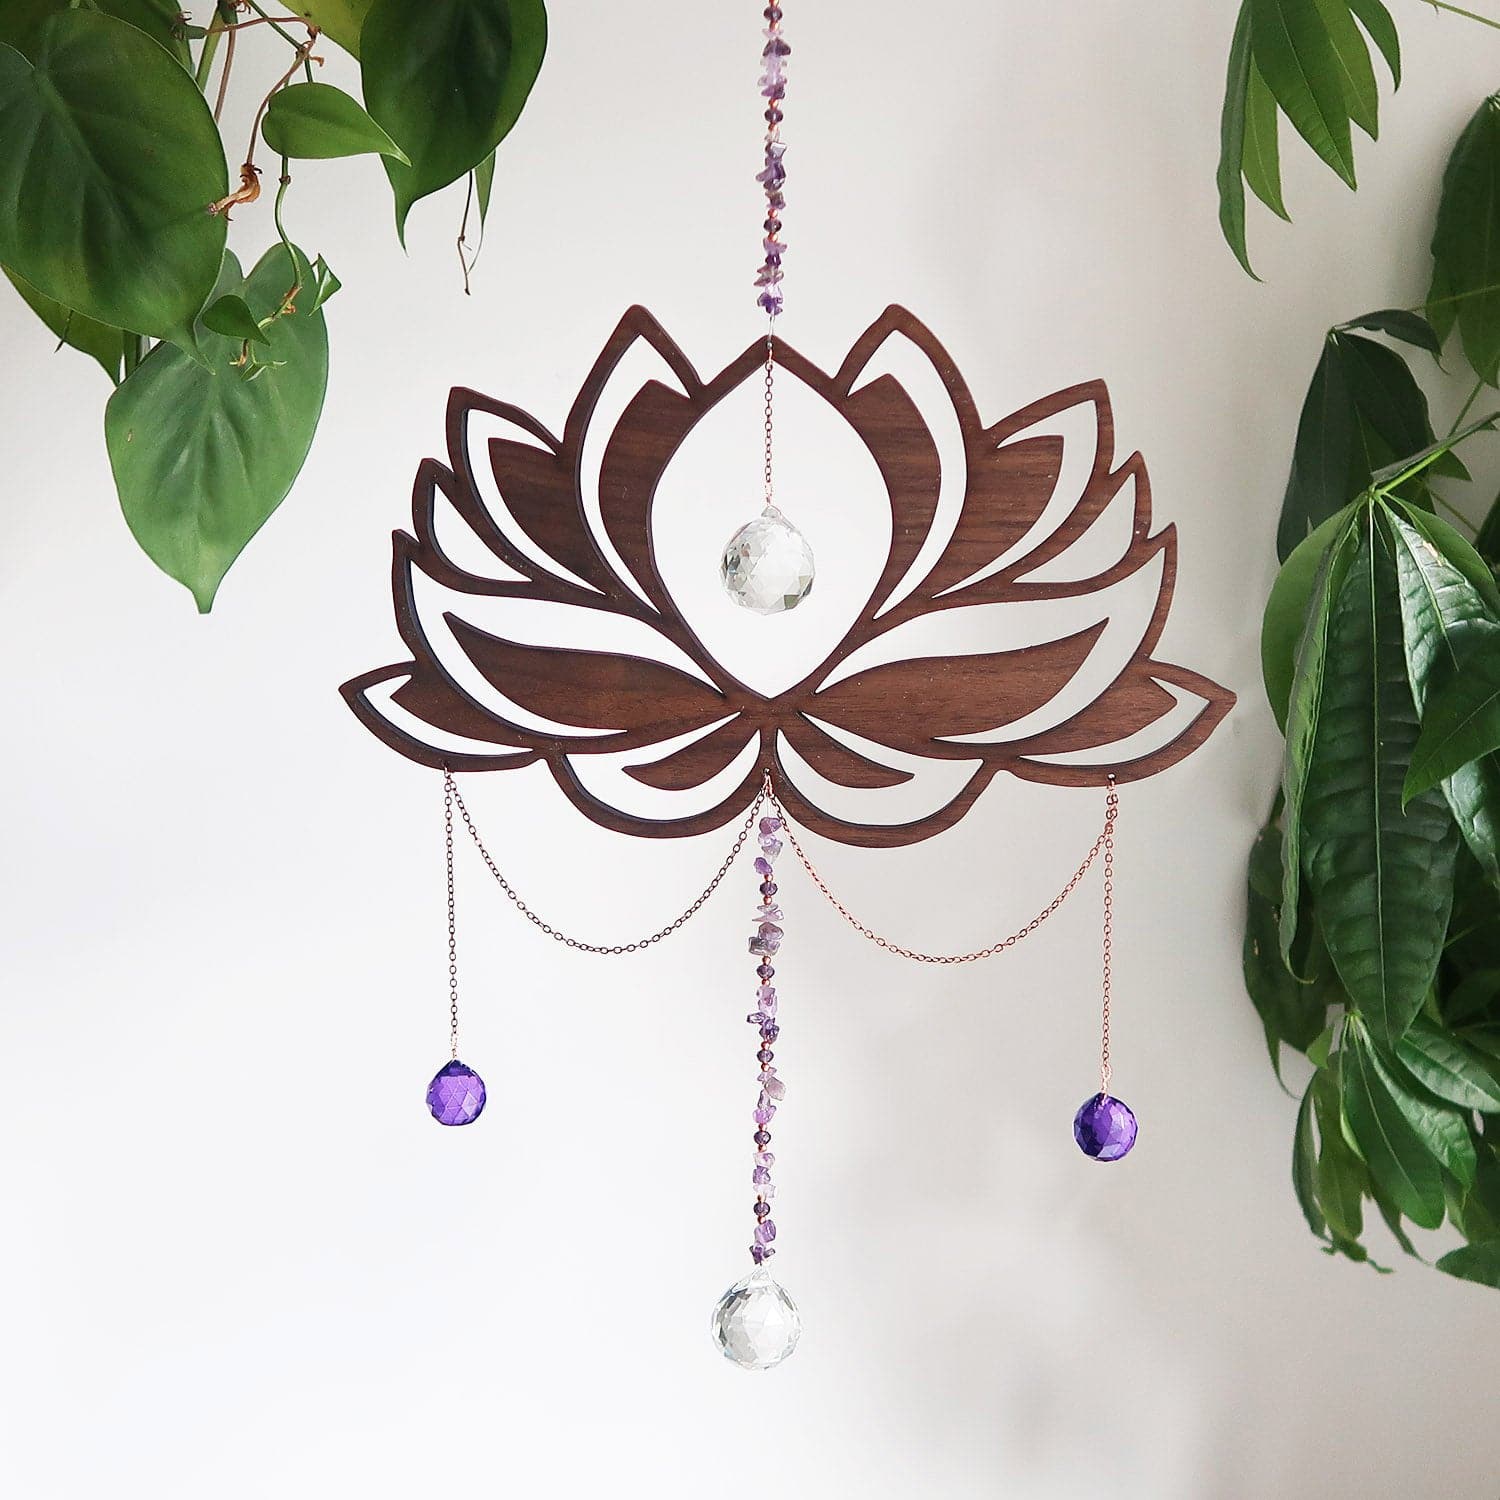
For a professional example, our Amethyst Lotus Flower Suncatcher showcases how strategically placed copper beads between crystals create a cohesive flow while enhancing visual appeal.
Step 6: Assemble Your Suncatcher
Balanced assembly ensures your suncatcher hangs properly while creating harmonious patterns.
Assembly steps:
- Attach hanging elements to your base, starting with the center crystal
- Vary the lengths to create visual interest
- Test the balance by holding up your base
- Make adjustments until it hangs evenly
- Secure all knots with a tiny drop of clear glue if needed
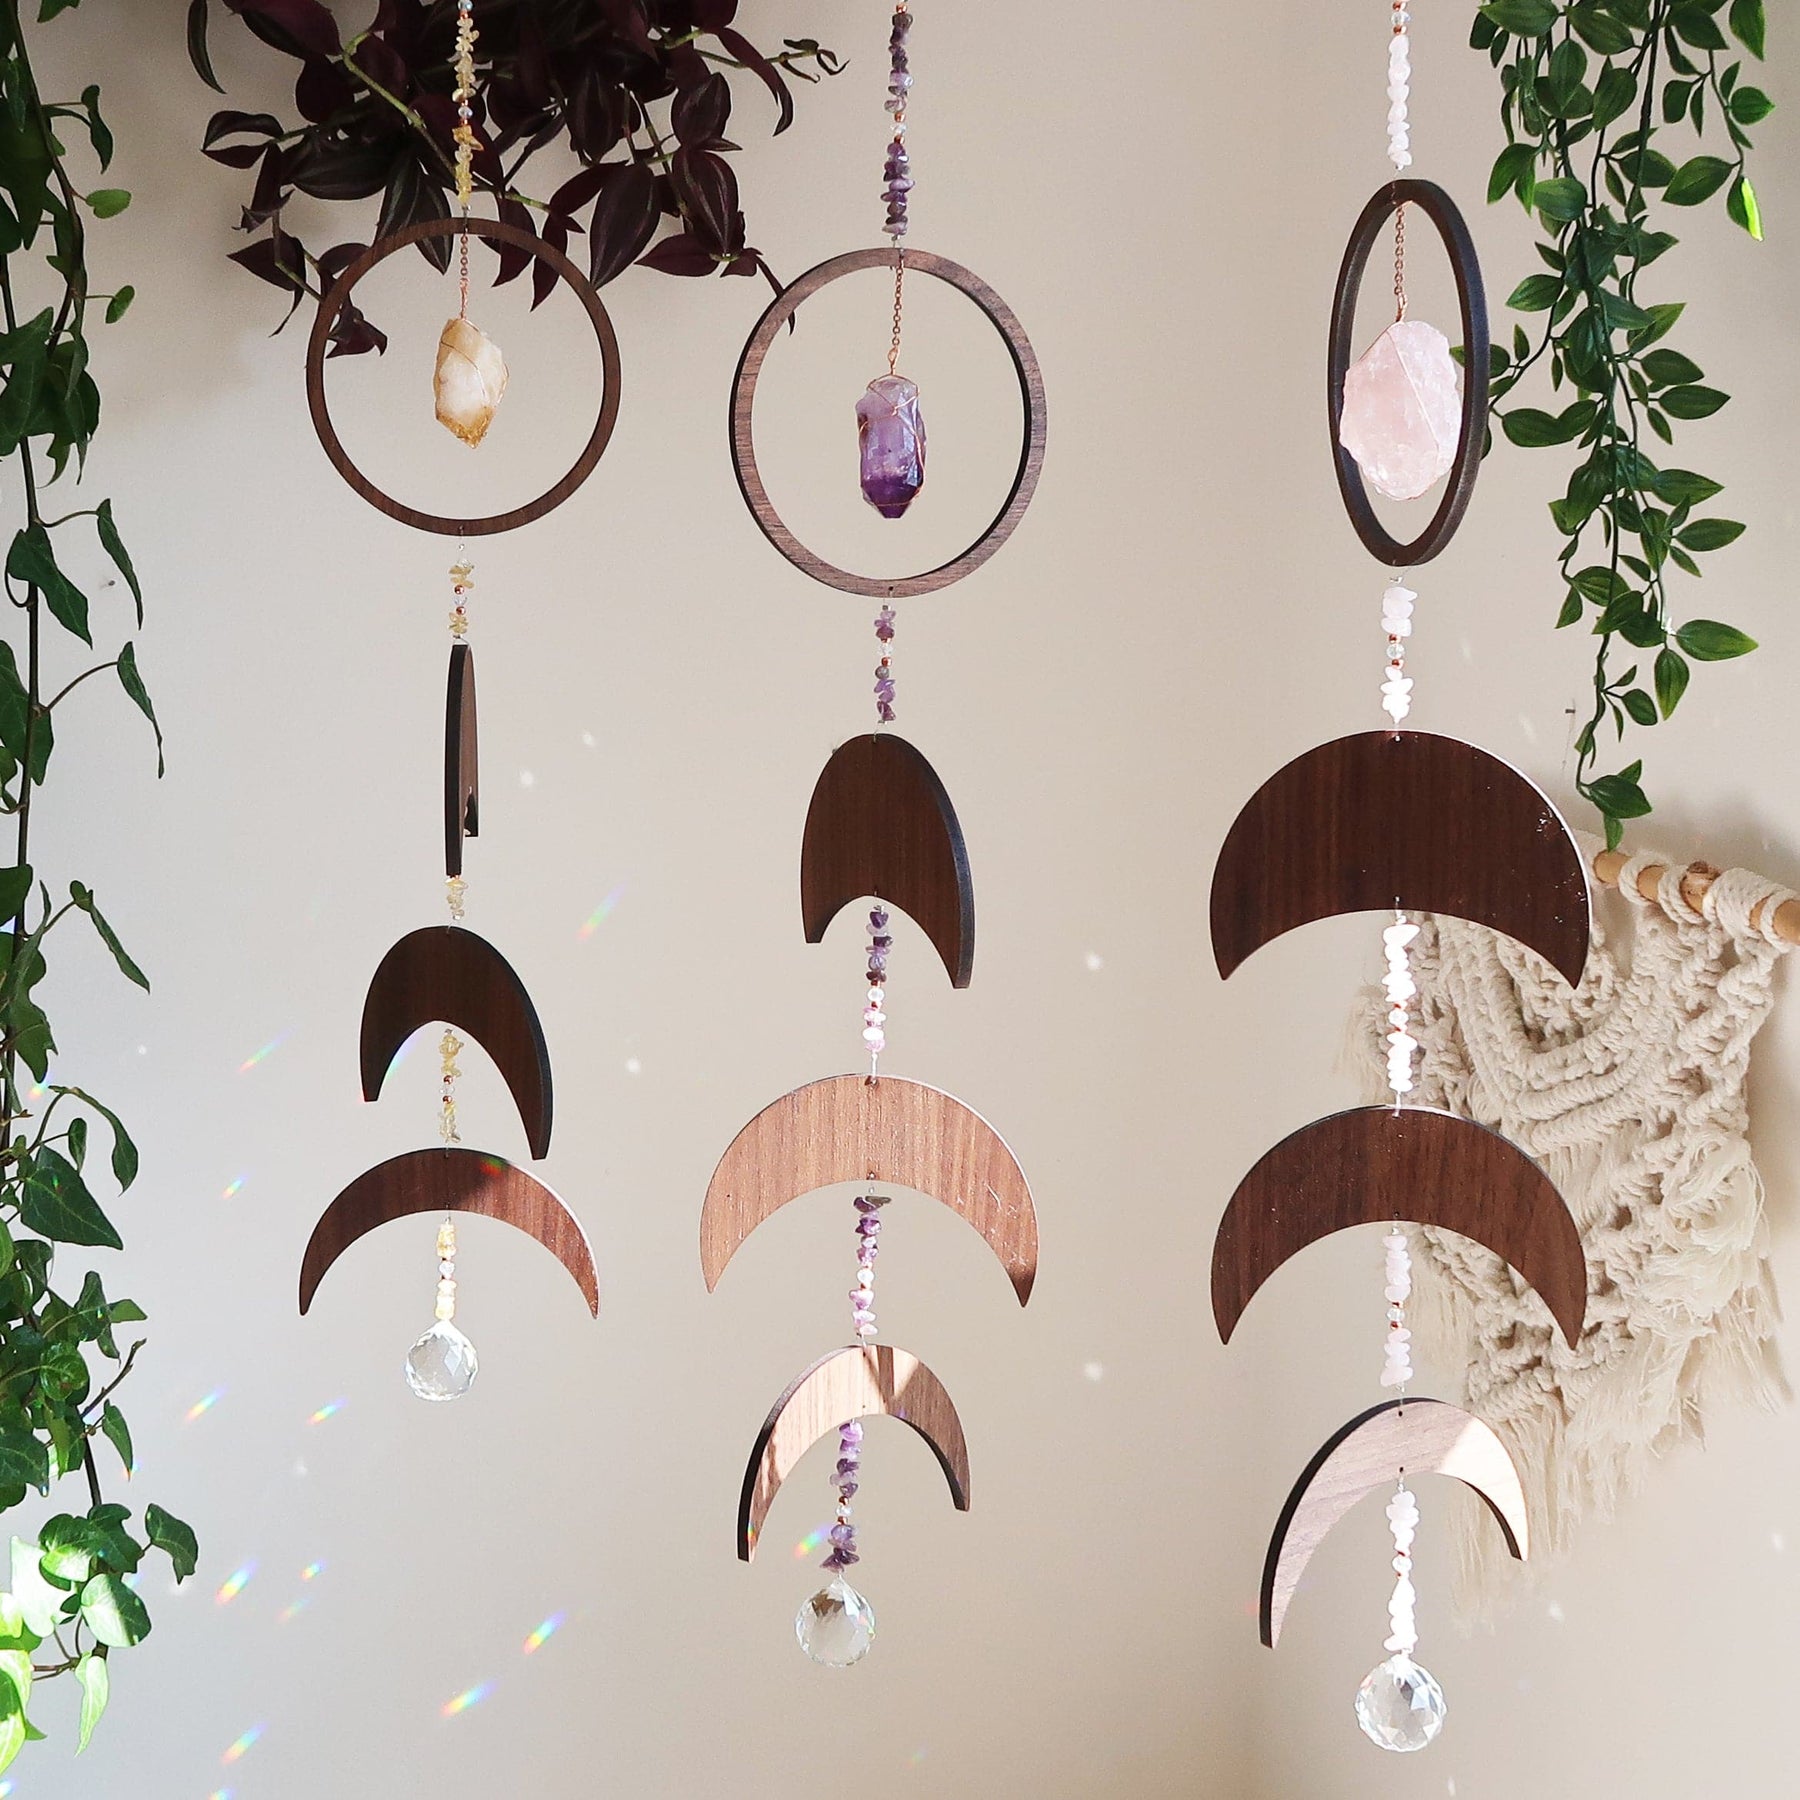
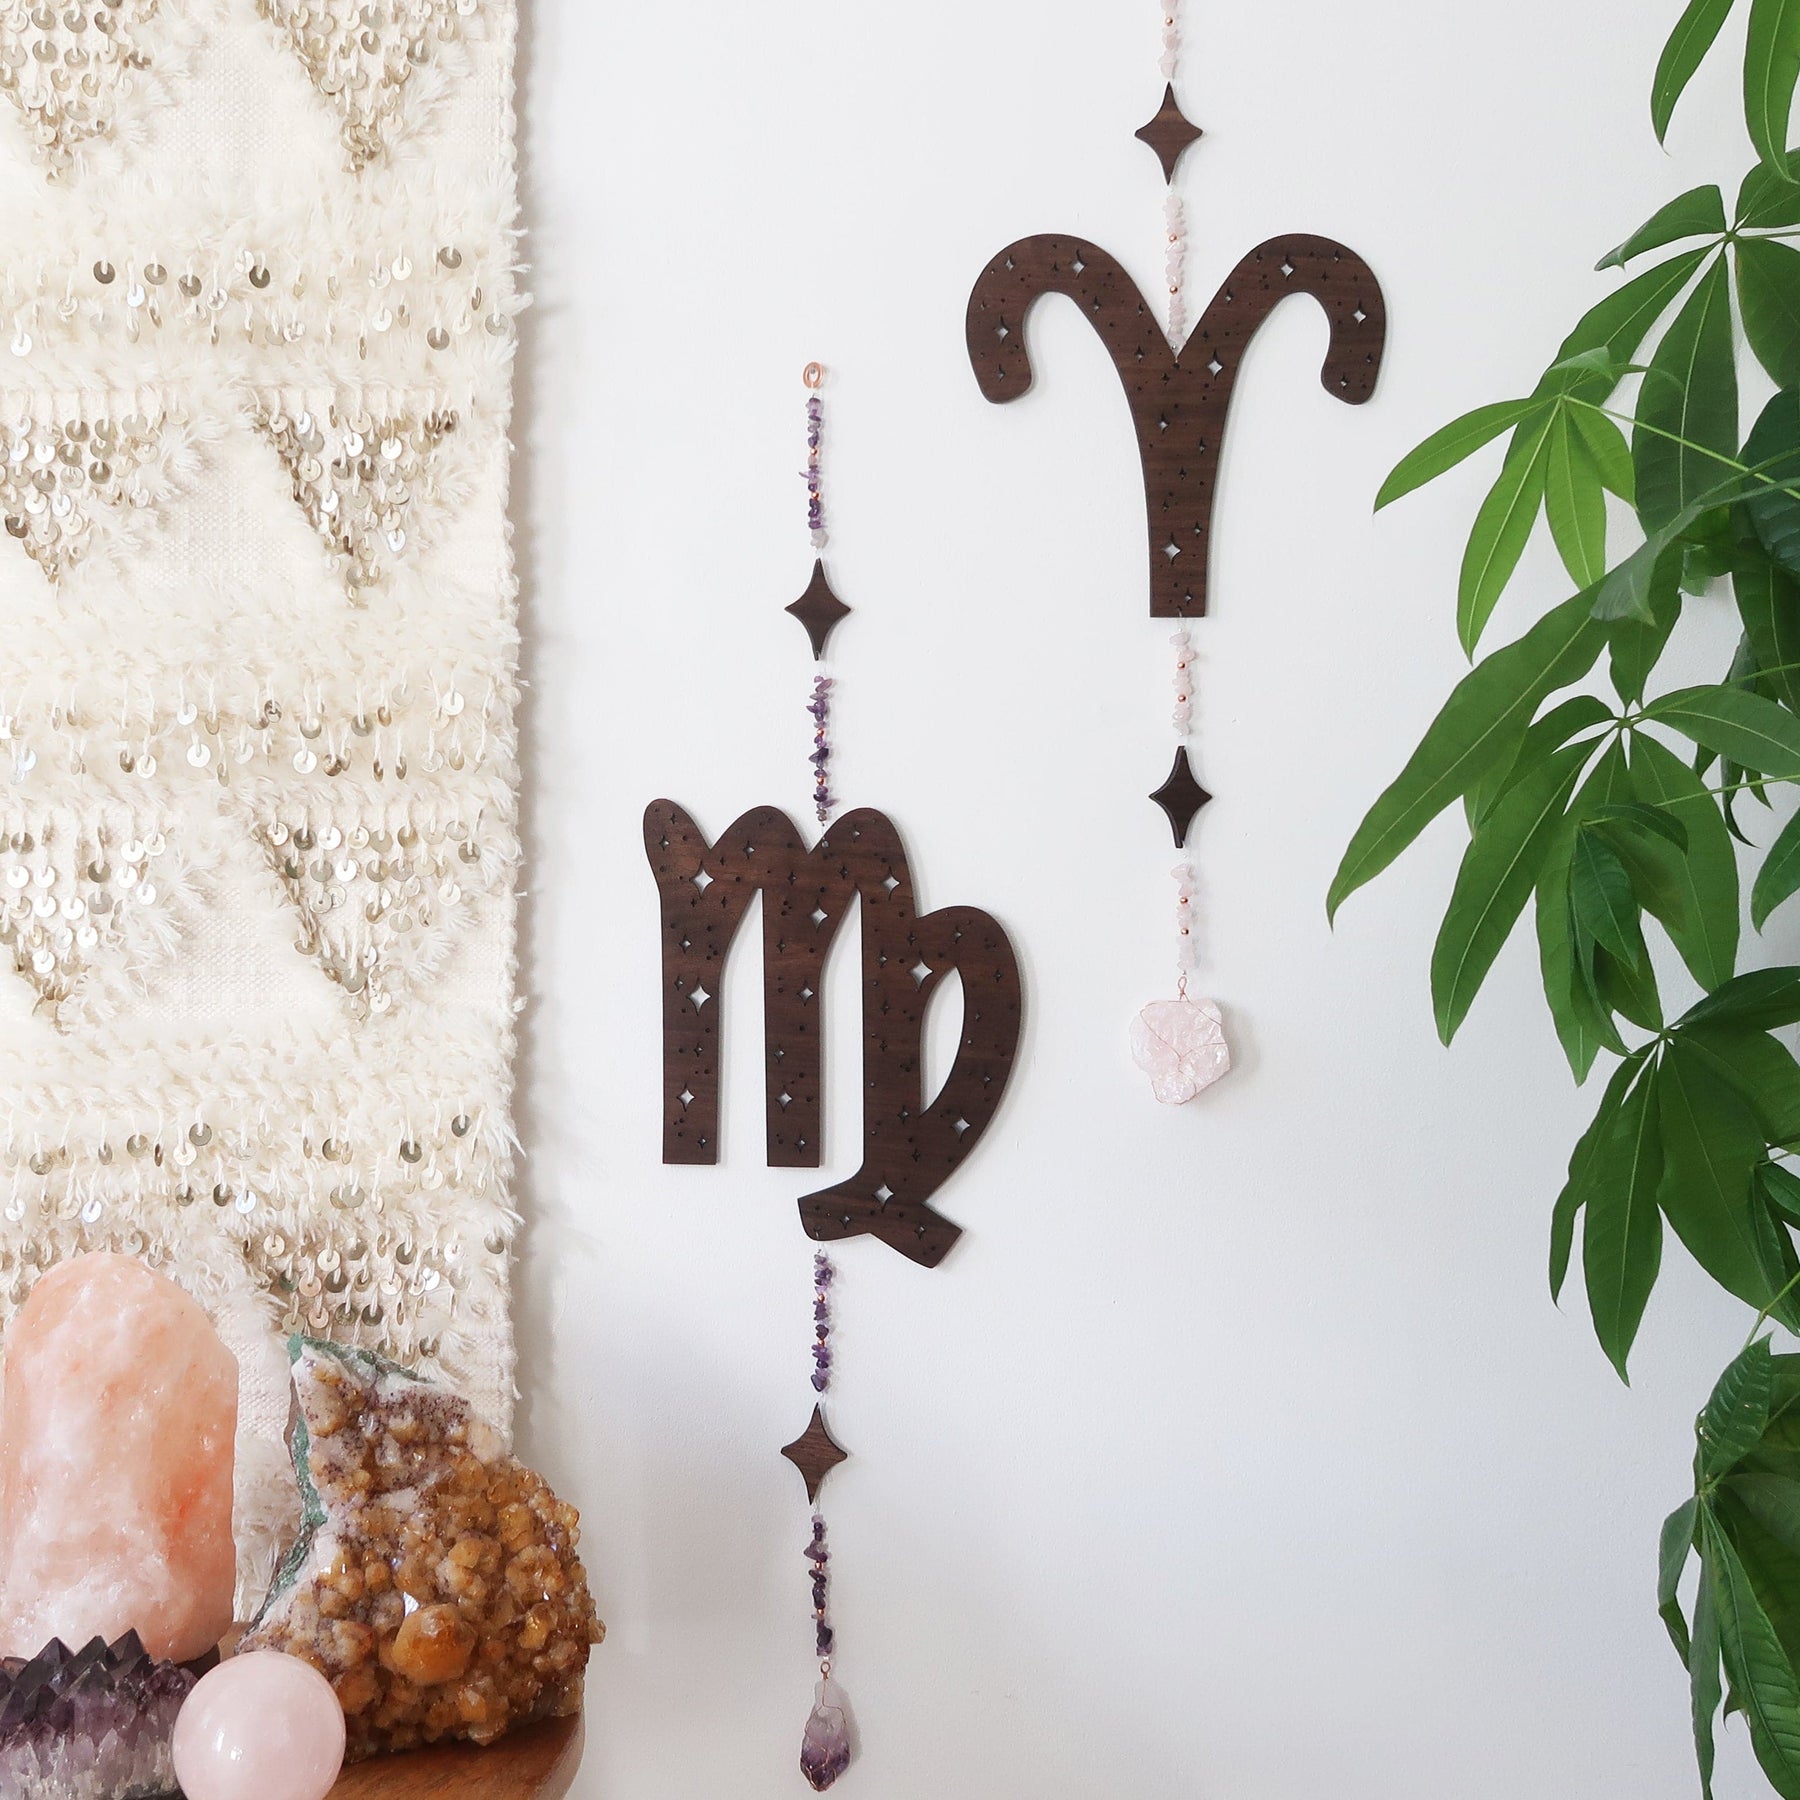
While DIY suncatchers are typically simpler, our Zodiac Crystal Wall Hangings demonstrate how multiple hanging elements can be balanced to create a cohesive pattern.
Step 7: Create a Hanging Mechanism
A secure hanging mechanism ensures your suncatcher remains safely displayed.
For hanging your suncatcher:
- Create a loop at the top of your base using fishing line or wire
- For wooden bases, screw in a small eye hook
- Test the strength by gently pulling on the hanging loop
- Consider adding a small crystal above the hanging point
Placement Tips for Maximum Effect
Strategic placement dramatically impacts how your suncatcher interacts with light throughout the day.
Best locations:
- East-facing windows for morning light
- West-facing windows for afternoon effects
- Near but not directly in south-facing windows
- Hang at different heights to catch light at different angles
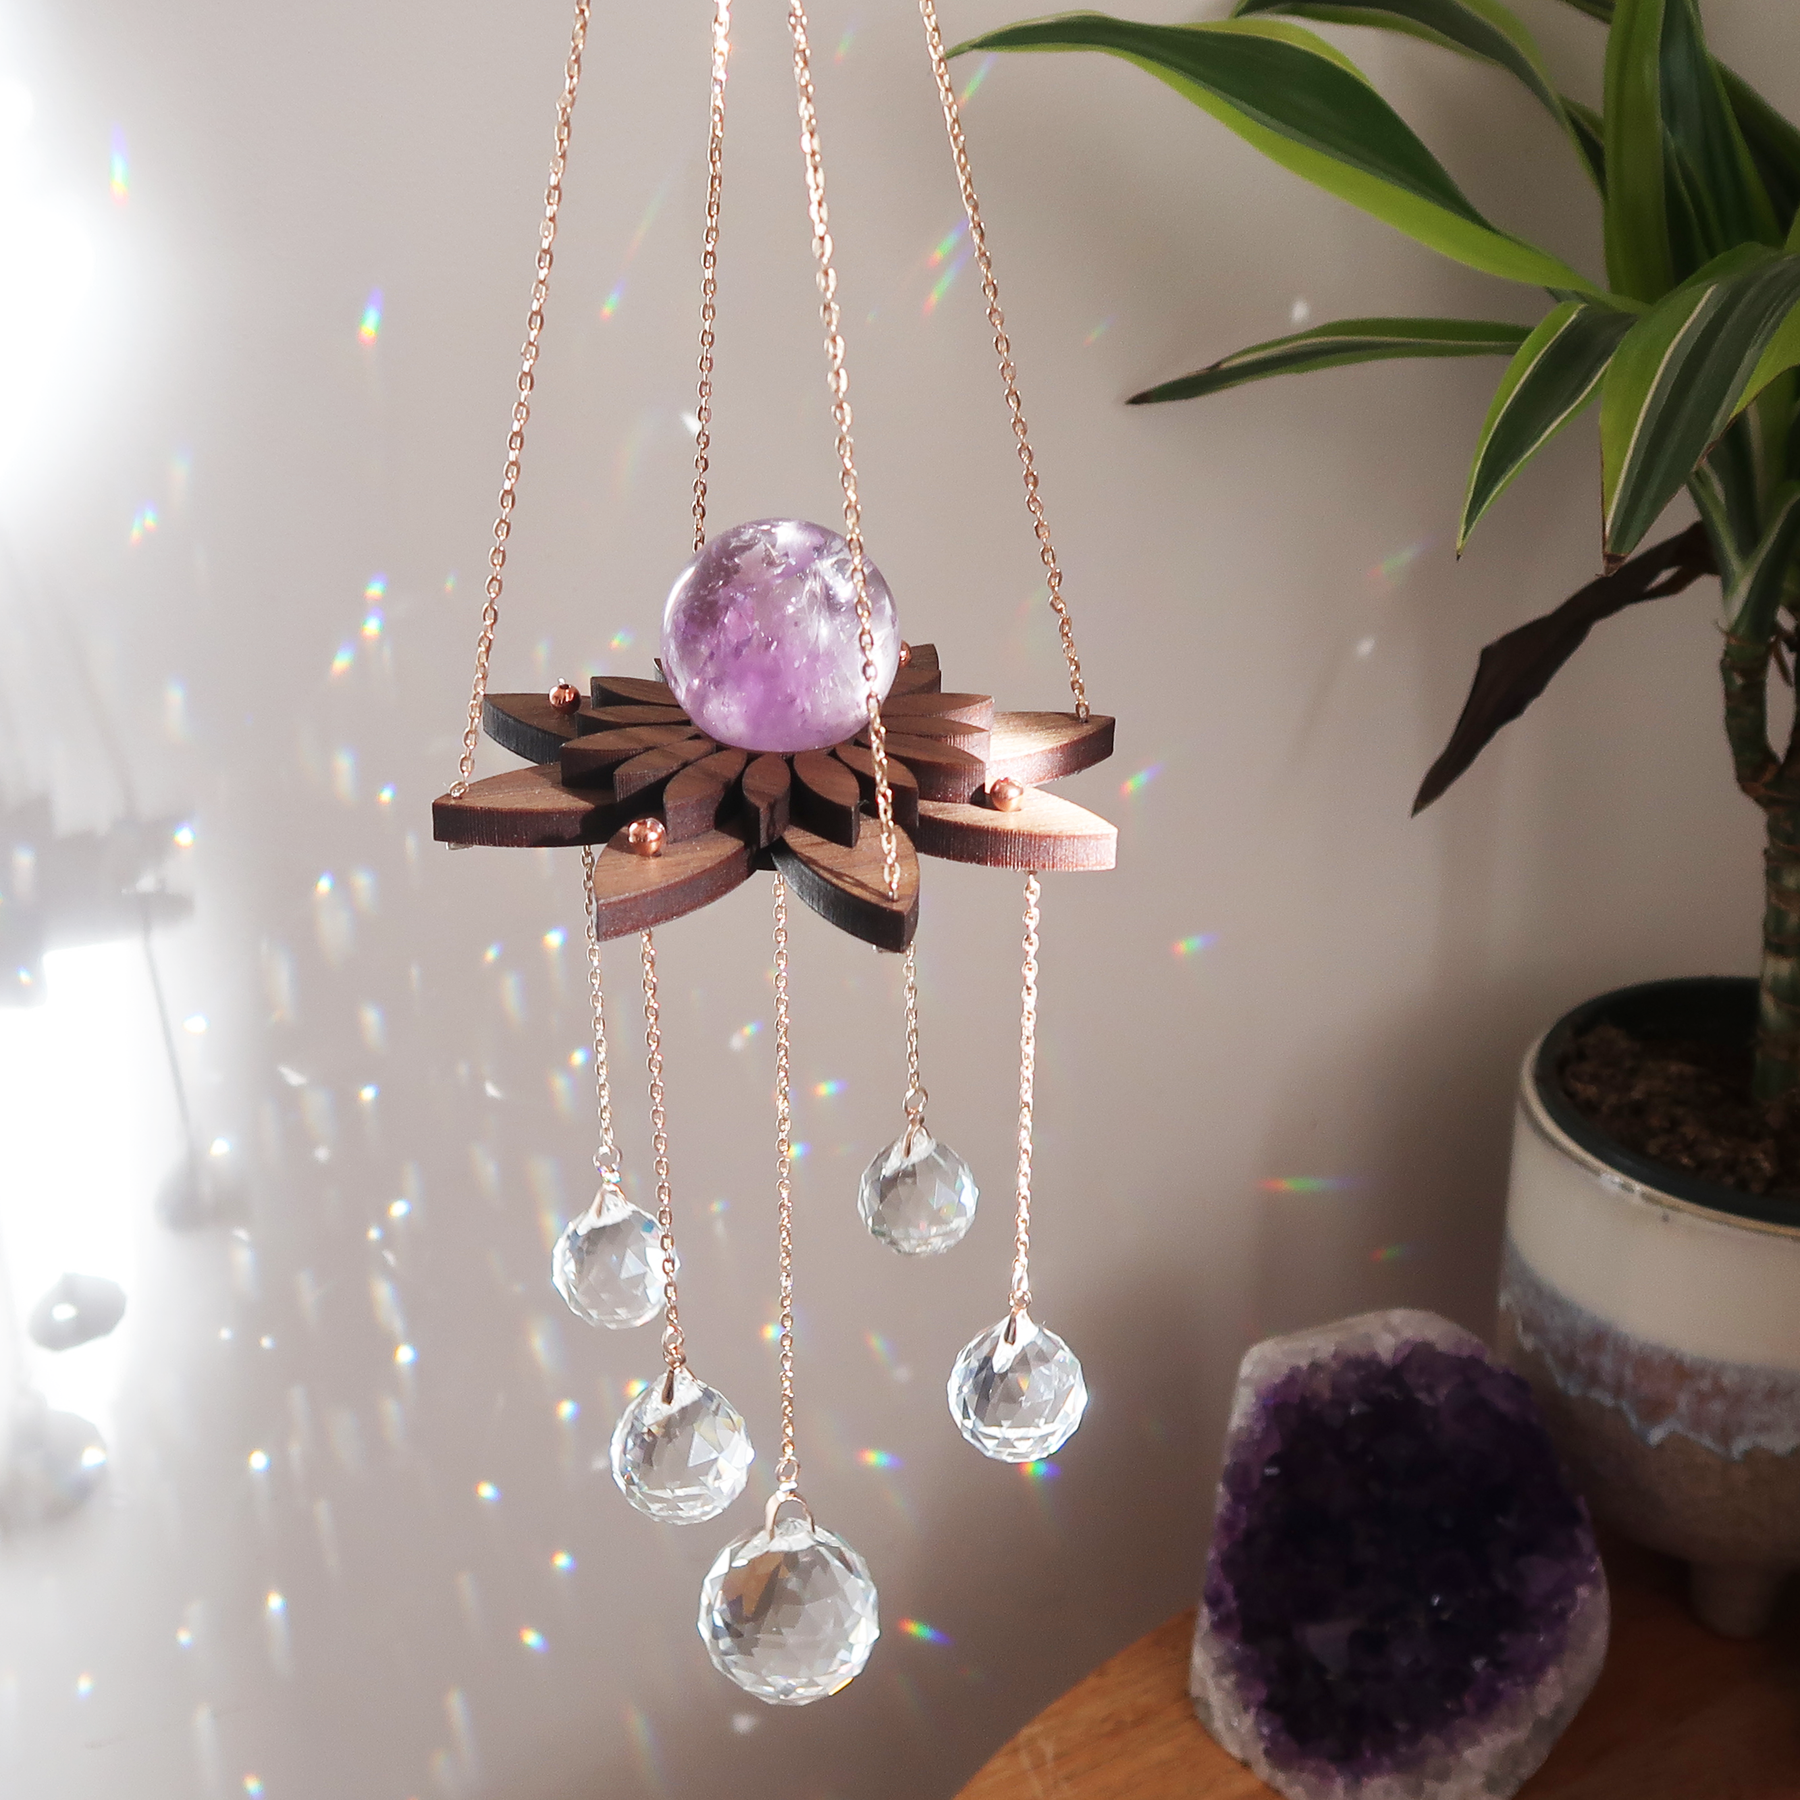
If your DIY suncatcher creates only modest rainbow effects, consider upgrading to a professionally designed option like our Small Lotus Flower Suncatcher Sphere Holder, which features calibrated prisms specifically designed to maximize light refraction.
Maintenance and Care
Regular maintenance keeps your suncatcher creating vibrant rainbow displays.
Care tips:
- Cleanse monthly under full moonlight
- Dust gently with a soft brush
- Check attachments for wear
- Recharge crystals seasonally in brief morning sunlight
Level Up Your Crystal Display
While DIY suncatchers are rewarding, many crystal enthusiasts eventually add professional pieces for more dramatic effects.
For those who love creating but want reliable rainbow effects, consider our ready-to-hang crystal suncatchers that bring professional craftsmanship to your space while honoring your creative spirit.
Final Thoughts
Creating your own crystal suncatcher connects you personally to the energy it brings into your space.
Whether you craft your own simple design or add professionally crafted pieces to your collection, the rainbow magic these tools bring creates joy and energetic transformation.
About the Author

Janie Fagan is the lead writer and resident crystal expert at Coppermoon.
With over 20 years of experience in spiritual practices and crystal work, Janie comes from a lineage of spiritualists who have passed down their wisdom through generations.
Her approach combines traditional knowledge with practical, modern applications, helping readers create sacred spaces that honor both ancient traditions and contemporary needs.
When not writing or working with crystals, Janie can be found tending to her moon garden, practicing sound healing, and exploring the connection between celestial movements and earth energies.
She believes that everyone deserves access to the tools and knowledge that make spiritual practice accessible and meaningful in everyday life.
Leave a comment